*본 게시물은 Kubernetes Advanced Networking Study (=KANS)의 주차별 학습주제를 기반으로 개인이 테스트한 내용을 추가하여 재가공하였습니다.
1. Vagrant
1-1. Vagrant 개요
2010년 1월 미첼 하시모토의 개인 프로젝트로 시작된 vagrant는 2010년 3월 최초 버전이 출시된 가상 머신 기반 개발 환경 관리 도구 오픈소스이다. 2012년 11월 vagrant의 개발을 서포트하기 위해 HashiCorp가 설립되어 상용 버전에 대해서 추가 기능을 개발 및 지원하고 있으며, 이외에는 현재까지 licensed free 소프트웨어로 이용 가능하다.
원래는 VirtualBox에 한해서만 지원하였으나 1.1 버전부터는 vmware, kvm, AWS EC2를, 1.6 버전부터 도커 컨테이너 환경을 지원한다고 한다. 현재 최신 버전은 2.2.9버전이다.(사실 AWS 환경에 대한 구성은 terraform을 이용하는 편이 좋아보이는데, 추후에 비교해보기로..)
쉽게 말해 vagrant를 이용하면 vm 이미지를 받아서 설치하고 virtualbox에 환경까지 자동으로 잡아주며, 동일 세팅을 다른 사람들과 공유할 수 있다. 기존에 VirtualBox나 VMware를 이용했을 때의 경험과 비교해보면 일련의 과정이 매우 간소화된다는 점에서 VirutalBox를 이용하는 환경에서는 매우 강력하게 활용될 수 있는 IaC 도구라는 생각이 든다.
1-2. Vagrant 설치
1-2-1. VirtualBox 설치
실습 환경에서는 Vagrant를 이용하여 VirtualBox 기반의 가상 환경에서 k8s 클러스터를 구축할 것이므로 OS 환경에 맞는 VirtualBox를 설치한다.
1-2-2. Vagrant 설치
Vagrant의 최신 버전을 설치한다.
Vagrant 설치페이지
1-2-3. 설치 확인
아래 unix의 기본 명령어 몇 가지는 windows powershell이나 windows terminal에서도 지원한다. 필자는 windows에서 진행했음. 터미널은 관리자 권한으로 실행한다.
workspace용 디렉토리 생성 후 이동
PS C:\Users\isnt> mkdir KANS


    디렉터리: C:\Users\isnt


Mode                 LastWriteTime         Length Name
----                 -------------         ------ ----
d-----      2022-01-06   오후 9:44                KANS


PS C:\Users\isnt> cd KANS
vagrant init & Vagrantfile
$ vagrant init 명령을 실행하면 현재 디렉토리에 Vagrantfile이 생성된다. vagrant는 해당 파일에 설정된 내용을 바탕으로 VM 환경을 구성하게 된다.
PS C:\Users\isnt\KANS> vagrant init hashicorp/bionic64
A `Vagrantfile` has been placed in this directory. You are now
ready to `vagrant up` your first virtual environment! Please read
the comments in the Vagrantfile as well as documentation on
`vagrantup.com` for more information on using Vagrant.

PS C:\Users\isnt\KANS> ls


    디렉터리: C:\Users\isnt\KANS


Mode                 LastWriteTime         Length Name
----                 -------------         ------ ----
-a----      2022-01-06   오후 9:46           3094 Vagrantfile

PS C:\Users\isnt\KANS> cat .\Vagrantfile
# -*- mode: ruby -*-
# vi: set ft=ruby :

# All Vagrant configuration is done below. The "2" in Vagrant.configure
# configures the configuration version (we support older styles for
# backwards compatibility). Please don't change it unless you know what
# you're doing.
Vagrant.configure("2") do |config|
  # The most common configuration options are documented and commented below.
  # For a complete reference, please see the online documentation at
  # https://docs.vagrantup.com.

  # Every Vagrant development environment requires a box. You can search for
  # boxes at https://vagrantcloud.com/search.
  config.vm.box = "hashicorp/bionic64"

  # Disable automatic box update checking. If you disable this, then
  # boxes will only be checked for updates when the user runs
  # `vagrant box outdated`. This is not recommended.
  # config.vm.box_check_update = false

  # Create a forwarded port mapping which allows access to a specific port
  # within the machine from a port on the host machine. In the example below,
  # accessing "localhost:8080" will access port 80 on the guest machine.
  # NOTE: This will enable public access to the opened port
  # config.vm.network "forwarded_port", guest: 80, host: 8080

  # Create a forwarded port mapping which allows access to a specific port
  # within the machine from a port on the host machine and only allow access
  # via 127.0.0.1 to disable public access
  # config.vm.network "forwarded_port", guest: 80, host: 8080, host_ip: "127.0.0.1"

  # Create a private network, which allows host-only access to the machine
  # using a specific IP.
  # config.vm.network "private_network", ip: "192.168.33.10"

  # Create a public network, which generally matched to bridged network.
  # Bridged networks make the machine appear as another physical device on
  # your network.
  # config.vm.network "public_network"

  # the path on the host to the actual folder. The second argument is
  # the path on the guest to mount the folder. And the optional third
  # argument is a set of non-required options.
  # config.vm.synced_folder "../data", "/vagrant_data"

  # Provider-specific configuration so you can fine-tune various
  # backing providers for Vagrant. These expose provider-specific options.
  # Example for VirtualBox:
  #
  # config.vm.provider "virtualbox" do |vb|
  #   # Display the VirtualBox GUI when booting the machine
  #   vb.gui = true
  #
  #   # Customize the amount of memory on the VM:
  #   vb.memory = "1024"
  # end
  #
  # View the documentation for the provider you are using for more
  # information on available options.

  # Enable provisioning with a shell script. Additional provisioners such as
  # Ansible, Chef, Docker, Puppet and Salt are also available. Please see the
  # documentation for more information about their specific syntax and use.
  # config.vm.provision "shell", inline: <<-SHELL
  #   apt-get update
  #   apt-get install -y apache2
  # SHELL
end
주석처리된 라인을 제외하고 보면 간단하다
Vagrant.configure("2") do |config|
  config.vm.box = "hashicorp/bionic64"
end
Vagrant.configure는 Vagrantfile의 do부터 end 사이에 명시된 내용이 어떤 config 버전을 따르고 있는지 의미한다. 이는 Vagrant 버전에 따라 달라질 수 있다.
config.vm 은 vagrant가 관리하는 시스템의 구성을 지정한다. box는 VM을 가져올 vagrant box를 가리키며 이 box의 이름은 hashicorp/bionic64이다. vagrant box의 명칭은 vagrant cloud에서 조회 가능해야 한다. 이외 구체적인 사용법에 대해서는 링크 참조.
vagrant up
vagrant up 을 실행하면 Vagrantfile에 기입된 내용을 읽어들여 Virtualbox에 VM 환경을 자동으로 구성하기 시작한다.
PS C:\Users\isnt\KANS> vagrant up
Bringing machine 'default' up with 'virtualbox' provider...
==> default: Checking if box 'hashicorp/bionic64' version '1.0.282' is up to date...
==> default: Clearing any previously set forwarded ports...
==> default: Clearing any previously set network interfaces...
==> default: Preparing network interfaces based on configuration...
    default: Adapter 1: nat
==> default: Forwarding ports...
    default: 22 (guest) => 2222 (host) (adapter 1)
==> default: Booting VM...
==> default: Waiting for machine to boot. This may take a few minutes...
    default: SSH address: 127.0.0.1:2222
    default: SSH username: vagrant
    default: SSH auth method: private key
    default:
    default: Vagrant insecure key detected. Vagrant will automatically replace
    default: this with a newly generated keypair for better security.
    default:
    default: Inserting generated public key within guest...
    default: Removing insecure key from the guest if it's present...
    default: Key inserted! Disconnecting and reconnecting using new SSH key...
==> default: Machine booted and ready!
==> default: Checking for guest additions in VM...
    default: The guest additions on this VM do not match the installed version of
    default: VirtualBox! In most cases this is fine, but in rare cases it can
    default: prevent things such as shared folders from working properly. If you see
    default: shared folder errors, please make sure the guest additions within the
    default: virtual machine match the version of VirtualBox you have installed on
    default: your host and reload your VM.
    default:
    default: Guest Additions Version: 6.0.10
    default: VirtualBox Version: 6.1
==> default: Mounting shared folders...
    default: /vagrant => C:/Users/isnt/KANS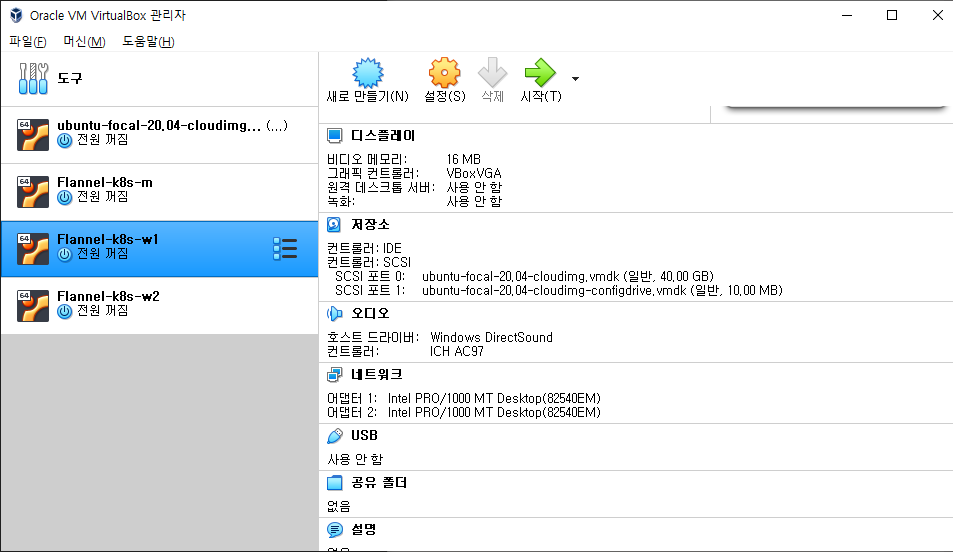
구성이 완료되면 위와 같이 VirtualBox 에서 새로운 환경이 구성되었음을 확인할 수 있다.
vagrant status
- vagrant up 실행 전
PS C:\Users\isnt\KANS> vagrant status
Current machine states:

default not created (virtualbox)- vagrant up 실행 후
PS C:\Users\isnt\KANS> vagrant status
Current machine states:

default                    running (virtualbox)
vagrant에 의해 구성된 VM 리스트와 상태를 확인할 수 있다.
vagrant ssh-config
VM이 올라오고 실행중인 상태이면 workspace의 vagrant에서 관리하고 있는 머신 중 ssh 연결이 가능한 머신을 확인할 수 있다.
PS C:\Users\isnt\KANS> vagrant ssh-config
Host default
  HostName 127.0.0.1
  User vagrant
  Port 2222
  UserKnownHostsFile /dev/null
  StrictHostKeyChecking no
  PasswordAuthentication no
  IdentityFile C:/Users/isnt/KANS/.vagrant/machines/default/virtualbox/private_key
  IdentitiesOnly yes
  LogLevel FATAL
vagrant에서 자체 관리하는 ssh-config 파일이 있어 host의 ~/.ssh/config를 조회해도 위의 내용을 확인할 수 없다. 그러나 vagrant ssh-config의 결과를 host의 ~/.ssh/config로 리다이렉트 시키면 추후에는 vagrant ssh <hostname>이 아닌, ssh <hostname>으로 일반적인 ssh 명령을 이용하여 접근할 수 있게 된다.
#예시
PS C:\Users\isnt\KANS> vagrant ssh-config --host default >> ~/.ssh/config
hostname은 별도로 지정하지 않는 경우 default가 자동으로 들어간다.
실습에서는 vagrant ssh를 이용하여 서버에 연결해보면 아래와 같은 결과를 확인할 수 있다.
PS C:\Users\isnt\KANS> vagrant ssh
Welcome to Ubuntu 18.04.3 LTS (GNU/Linux 4.15.0-58-generic x86_64)

 * Documentation:  https://help.ubuntu.com
 * Management:     https://landscape.canonical.com
 * Support:        https://ubuntu.com/advantage

  System information as of Fri Jan  7 04:51:08 UTC 2022

  System load:  0.0               Processes:           91
  Usage of /:   2.5% of 61.80GB   Users logged in:     1
  Memory usage: 11%               IP address for eth0: 10.0.2.15
  Swap usage:   0%


0 packages can be updated.
0 updates are security updates.


Last login: Fri Jan  7 04:40:45 2022 from 10.0.2.2


vagrant@vagrant:~$ whoami
vagrant
vagrant destroy
해당 workspace에서 관리되는 VM 환경이 제거된다. 단, .vagrant 디렉토리까지 제거되지는 않으므로 수동으로 날려줘야 함.
PS C:\Users\isnt\KANS> vagrant destroy
    default: Are you sure you want to destroy the 'default' VM? [y/N] y
==> default: Forcing shutdown of VM...
==> default: Destroying VM and associated drives...
이외에 통신 테스트나 port forwarding, directory sharing 등 VirtubalBox에서 활용하던 기능들을 Vagrantfile에 정의하여 자동화 할 수 있다. 여기에 필요한 다양한 명령어 옵션들이 있으니 필요에 따라 공식 docs를 참조해서 활용하면 쉽게 자동화 가능할 것으로 보인다.
2. Vagrant를 이용한 k8s 클러스터 구축
2-1. VM 스펙
Master node
OS : Ubuntu 20.04.3 LTS
Processor : 2
Memory : 2048 MB
Worker node1
OS : Ubuntu 20.04.3 LTS
Processor : 2
Memory : 1536MB
Worker node2
OS : Ubuntu 20.04.3 LTS
Processor : 2
Memory : 1536MB
2-2. 환경 배포
앞서 학습한 vagrant의 기본적인 사용법 정도만 이해하면 생각보다 쉽게 구성할 수 있다. 구축에 사용된 Vagrantfile은 스터디를 주최하신 '가시다'님께서 공유해주신 파일을 사용함.(원본 링크)
PS C:\Users\isnt\KANS> curl -Uri https://raw.githubusercontent.com/gasida/NDKS/main/3/Vagrantfile -OutFile VagrantfilePS C:\Users\isnt\KANS> vagrant up
Bringing machine 'k8s-m' up with 'virtualbox' provider...
Bringing machine 'k8s-w1' up with 'virtualbox' provider...
Bringing machine 'k8s-w2' up with 'virtualbox' provider...
==> k8s-m: Box 'ubuntu/focal64' could not be found. Attempting to find and install...
k8s-m: Box Provider: virtualbox
k8s-m: Box Version: 20211026.0.0
==> k8s-m: Loading metadata for box 'ubuntu/focal64'
k8s-m: URL: https://vagrantcloud.com/ubuntu/focal64
==> k8s-m: Adding box 'ubuntu/focal64' (v20211026.0.0) for provider: virtualbox
k8s-m: Downloading: https://vagrantcloud.com/ubuntu/boxes/focal64/versions/20211026.0.0/providers/virtualbox.box
Download redirected to host: cloud-images.ubuntu.com
k8s-m:
==> k8s-m: Successfully added box 'ubuntu/focal64' (v20211026.0.0) for 'virtualbox'!
==> k8s-m: Preparing master VM for linked clones...
k8s-m: This is a one time operation. Once the master VM is prepared,
k8s-m: it will be used as a base for linked clones, making the creation
k8s-m: of new VMs take milliseconds on a modern system.
==> k8s-m: Importing base box 'ubuntu/focal64'...
==> k8s-m: Cloning VM...
==> k8s-m: Matching MAC address for NAT networking...
==> k8s-m: Checking if box 'ubuntu/focal64' version '20211026.0.0' is up to date...
==> k8s-m: Setting the name of the VM: Flannel-k8s-m
...중략
k8s-m: Context "kubernetes-admin@kubernetes" renamed to "admin-k8s".
k8s-m: % Total % Received % Xferd Average Speed Time Time Time Current
k8s-m: Dload Upload Total Spent Left Speed
100 12223 100 12223 0 0 19651 0 --:--:-- --:--:-- --:--:-- 19651
k8s-m: % Total % Received % Xferd Average Speed Time Time Time Current
k8s-m: Dload Upload Total Spent Left Speed
100 1652 100 1652 0 0 2893 0 --:--:-- --:--:-- --:--:-- 2888
==> k8s-w1: Box 'ubuntu/focal64' could not be found. Attempting to find and install...
k8s-w1: Box Provider: virtualbox
k8s-w1: Box Version: 20211026.0.0
==> k8s-w1: Loading metadata for box 'ubuntu/focal64'
k8s-w1: URL: https://vagrantcloud.com/ubuntu/focal64
==> k8s-w1: Adding box 'ubuntu/focal64' (v20211026.0.0) for provider: virtualbox
==> k8s-w1: Cloning VM...
==> k8s-w1: Matching MAC address for NAT networking...
==> k8s-w1: Checking if box 'ubuntu/focal64' version '20211026.0.0' is up to date...
==> k8s-w1: Setting the name of the VM: Flannel-k8s-w1
...중략
k8s-w1: * The Kubelet was informed of the new secure connection details.
k8s-w1:
k8s-w1: Run 'kubectl get nodes' on the control-plane to see this node join the cluster.
k8s-w1:
==> k8s-w2: Box 'ubuntu/focal64' could not be found. Attempting to find and install...
k8s-w2: Box Provider: virtualbox
k8s-w2: Box Version: 20211026.0.0
==> k8s-w2: Loading metadata for box 'ubuntu/focal64'
k8s-w2: URL: https://vagrantcloud.com/ubuntu/focal64
==> k8s-w2: Adding box 'ubuntu/focal64' (v20211026.0.0) for provider: virtualbox
==> k8s-w2: Cloning VM...
==> k8s-w2: Matching MAC address for NAT networking...
==> k8s-w2: Checking if box 'ubuntu/focal64' version '20211026.0.0' is up to date...
==> k8s-w2: Setting the name of the VM: Flannel-k8s-w2
...중략
k8s-w2: * The Kubelet was informed of the new secure connection details.
k8s-w2:
k8s-w2: Run 'kubectl get nodes' on the control-plane to see this node join the cluster.
k8s-w2:
PS C:\Users\isnt\KANS>2-3. 구축 확인
- 구성이 완료된 후 vagrant status로 master node 1개, worker node 2개가 구성되었는지 확인
- vagrant ssh로 마스터노드에 접속하여 kubectl get node 실행하여 모든 k8s 노드가 조회되는지 확인
PS C:\Users\isnt\KANS> vagrant status
Current machine states:

k8s-m                     running (virtualbox)
k8s-w1                    running (virtualbox)
k8s-w2                    running (virtualbox)

This environment represents multiple VMs. The VMs are all listed
above with their current state. For more information about a specific
VM, run `vagrant status NAME`.


PS C:\Users\isnt\KANS> vagrant ssh k8s-m
Welcome to Ubuntu 20.04.3 LTS (GNU/Linux 5.4.0-92-generic x86_64)

 * Documentation:  https://help.ubuntu.com
 * Management:     https://landscape.canonical.com
 * Support:        https://ubuntu.com/advantage

  System information as of Fri Jan  7 05:17:05 UTC 2022

  System load:  0.31              Users logged in:          0
  Usage of /:   8.2% of 38.71GB   IPv4 address for cni0:    172.16.0.1
  Memory usage: 38%               IPv4 address for docker0: 172.17.0.1
  Swap usage:   0%                IPv4 address for enp0s3:  10.0.2.15
  Processes:    165               IPv4 address for enp0s8:  192.168.100.10

 * Super-optimized for small spaces - read how we shrank the memory
   footprint of MicroK8s to make it the smallest full K8s around.

   https://ubuntu.com/blog/microk8s-memory-optimisation

1 update can be applied immediately.
To see these additional updates run: apt list --upgradable


Last login: Fri Jan  7 05:15:01 2022 from 10.0.2.2
(⎈ |admin-k8s:default) root@k8s-m:~#


(⎈ |admin-k8s:default) root@k8s-m:~# kubectl get nodes
NAME     STATUS   ROLES                  AGE   VERSION
k8s-m    Ready    control-plane,master   14h   v1.21.8
k8s-w1   Ready    <none>                 14h   v1.21.8
k8s-w2   Ready    <none>                 14h   v1.21.8
2-3. 가상머신 중지, 재시작
PS C:\Users\isnt\KANS> vagrant halt
==> k8s-w2: Attempting graceful shutdown of VM...
==> k8s-w2: Forcing shutdown of VM...
==> k8s-w1: Attempting graceful shutdown of VM...
==> k8s-w1: Forcing shutdown of VM...
==> k8s-m: Attempting graceful shutdown of VM...
==> k8s-m: Forcing shutdown of VM...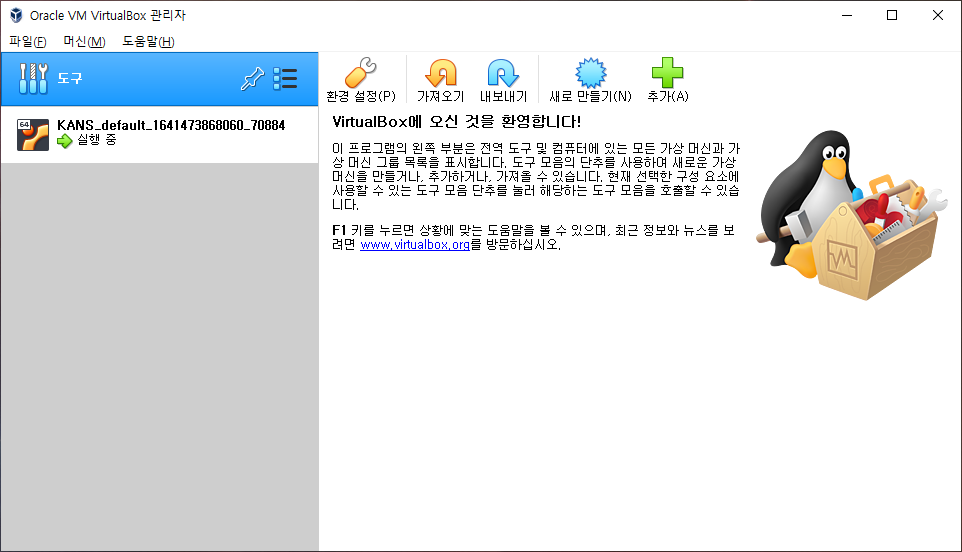
PS C:\Users\isnt\KANS> vagrant reload
==> k8s-m: Checking if box 'ubuntu/focal64' version '20211026.0.0' is up to date...
==> k8s-m: Clearing any previously set forwarded ports...
==> k8s-m: Clearing any previously set network interfaces...
==> k8s-m: Preparing network interfaces based on configuration...
    k8s-m: Adapter 1: nat
    k8s-m: Adapter 2: hostonly
==> k8s-m: Forwarding ports...
    k8s-m: 22 (guest) => 50010 (host) (adapter 1)
==> k8s-m: Running 'pre-boot' VM customizations...
==> k8s-m: Booting VM...
==> k8s-m: Waiting for machine to boot. This may take a few minutes...
    k8s-m: SSH address: 127.0.0.1:50010
    k8s-m: SSH username: vagrant
    k8s-m: SSH auth method: private key
3. Trouble Shooting
만약 windows 환경에서 WSL을 사용하거나, docker desktop을 사용했다면 아래와 같은 에러가 발생한다. 원인은 hypervisorlaunchtype 값이 off로 지정되어 있기 때문이며, 이 값을 Auto로 변경한 후 재부팅한다.
PS C:\Users\isnt\KANS> vagrant up
Bringing machine 'default' up with 'virtualbox' provider...
==> default: Box 'hashicorp/bionic64' could not be found. Attempting to find and install...
    default: Box Provider: virtualbox
    default: Box Version: >= 0
==> default: Loading metadata for box 'hashicorp/bionic64'
    default: URL: https://vagrantcloud.com/hashicorp/bionic64
==> default: Adding box 'hashicorp/bionic64' (v1.0.282) for provider: virtualbox
    default: Downloading: https://vagrantcloud.com/hashicorp/boxes/bionic64/versions/1.0.282/providers/virtualbox.box
    default:
==> default: Successfully added box 'hashicorp/bionic64' (v1.0.282) for 'virtualbox'!
==> default: Importing base box 'hashicorp/bionic64'...
==> default: Matching MAC address for NAT networking...
==> default: Checking if box 'hashicorp/bionic64' version '1.0.282' is up to date...
==> default: Setting the name of the VM: KANS_default_1641473285307_53667
Vagrant is currently configured to create VirtualBox synced folders with
the `SharedFoldersEnableSymlinksCreate` option enabled. If the Vagrant
guest is not trusted, you may want to disable this option. For more
information on this option, please refer to the VirtualBox manual:

  https://www.virtualbox.org/manual/ch04.html#sharedfolders

This option can be disabled globally with an environment variable:

  VAGRANT_DISABLE_VBOXSYMLINKCREATE=1

or on a per folder basis within the Vagrantfile:

  config.vm.synced_folder '/host/path', '/guest/path', SharedFoldersEnableSymlinksCreate: false
==> default: Clearing any previously set network interfaces...
==> default: Preparing network interfaces based on configuration...
    default: Adapter 1: nat
==> default: Forwarding ports...
    default: 22 (guest) => 2222 (host) (adapter 1)
==> default: Booting VM...
There was an error while executing `VBoxManage`, a CLI used by Vagrant
for controlling VirtualBox. The command and stderr is shown below.

Command: ["startvm", "ddc6381d-8c69-46c8-8a8c-b6b18e22c6aa", "--type", "headless"]

Stderr: VBoxManage.exe: error: Call to NEMR0InitVMPart2 failed: VERR_NEM_INIT_FAILED (VERR_NEM_VM_CREATE_FAILED)
VBoxManage.exe: error: Details: code E_FAIL (0x80004005), component ConsoleWrap, interface IConsole
WSL2 사용시
bcdedit /set hypervisorlaunchtype auto 로 세팅
Virtualbox 사용시
bcdedit /set hypervisorlaunchtype off 로 세팅
PS C:\Users\isnt\KANS> bcdedit.exe

Windows 부팅 관리자
--------------------
identifier              {bootmgr}
device                  partition=\Device\HarddiskVolume3
path                    \EFI\MICROSOFT\BOOT\BOOTMGFW.EFI
description             Windows Boot Manager
locale                  ko-KR
inherit                 {globalsettings}
default                 {current}
resumeobject            {a94a1b8a-995f-11eb-983a-e82f3f6d6a36}
displayorder            {current}
toolsdisplayorder       {memdiag}
timeout                 30

Windows 부팅 로더
-------------------
identifier              {current}
device                  partition=C:
path                    \Windows\system32\winload.efi
description             Windows 10
locale                  ko-KR
inherit                 {bootloadersettings}
recoverysequence        {a94a1b8c-995f-11eb-983a-e82f3f6d6a36}
displaymessageoverride  Recovery
recoveryenabled         Yes
isolatedcontext         Yes
allowedinmemorysettings 0x15000075
osdevice                partition=C:
systemroot              \Windows
resumeobject            {a94a1b8a-995f-11eb-983a-e82f3f6d6a36}
nx                      OptIn
bootmenupolicy          Standard
hypervisorlaunchtype    Auto


PS C:\Users\isnt\KANS> bcdedit /set hypervisorlaunchtype off
작업을 완료했습니다.


PS C:\Users\isnt\KANS> bcdedit.exe

Windows 부팅 관리자
--------------------
identifier              {bootmgr}
device                  partition=\Device\HarddiskVolume3
path                    \EFI\MICROSOFT\BOOT\BOOTMGFW.EFI
description             Windows Boot Manager
locale                  ko-KR
inherit                 {globalsettings}
default                 {current}
resumeobject            {a94a1b8a-995f-11eb-983a-e82f3f6d6a36}
displayorder            {current}
toolsdisplayorder       {memdiag}
timeout                 30

Windows 부팅 로더
-------------------
identifier              {current}
device                  partition=C:
path                    \Windows\system32\winload.efi
description             Windows 10
locale                  ko-KR
inherit                 {bootloadersettings}
recoverysequence        {a94a1b8c-995f-11eb-983a-e82f3f6d6a36}
displaymessageoverride  Recovery
recoveryenabled         Yes
isolatedcontext         Yes
allowedinmemorysettings 0x15000075
osdevice                partition=C:
systemroot              \Windows
resumeobject            {a94a1b8a-995f-11eb-983a-e82f3f6d6a36}
nx                      OptIn
bootmenupolicy          Standard
hypervisorlaunchtype Off'Kubernetes > Kubernetes Advanced Networking Study' 카테고리의 다른 글
| AWS EKS에 Cilium CNI 설치하기 (2) | 2022.03.01 |
|---|---|
| k8s Calico CNI와 Calico Network Policy (3) | 2022.02.05 |
| 컨테이너 격리 & 도커 네트워크 (0) | 2022.01.31 |